
Boot & Shoe Drying Rack Plan
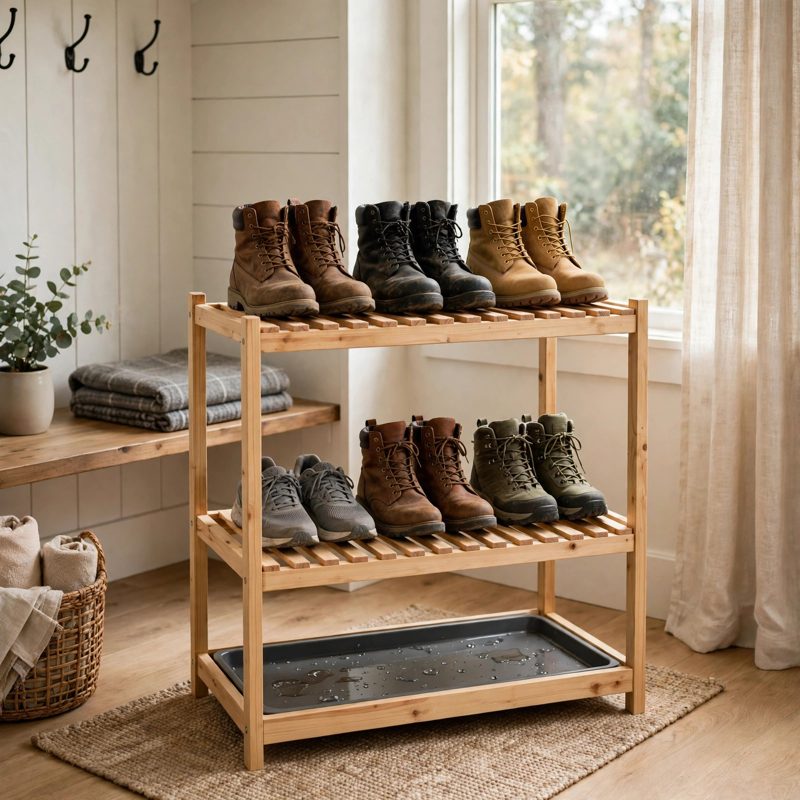
Not a standard off-grid kit - top-of-the-line, above and beyond the old style - safer by design, and every claim below names a real feature drawn into the plan itself.
THE BUILD: a freestanding two-tier boot and shoe DRYING rack with drainage - not a storage rack. A storage rack (including a bamboo shoe rack) holds dry shoes off the floor; this rack is built around the water a wet pair carries in. Finished size 39 x 15 x 36 in, holding 6 pairs (3 pairs per tier) over a removable drip tray. Open slatted tiers with gauged 1/2 in air gaps let air reach the soles and water fall straight through; dividers fence three 11-1/2 in bays per tier so wet pairs never touch and block each other's airflow; every drip path from either tier lands over the removable drip tray, proved in the plan by a poured-cup drainage test from both tiers. This is a PASSIVE air-dry design: there are no electrical heating instructions in the plan and none should be added - no heater, heat lamp, or heating element belongs in a wooden rack of wet footwear. The only electrical note is an optional room fan placed OUTSIDE the rack, on a GFCI outlet where it is used near a wet area.
THE TRAY IS SIZED BY MATH, NOT BY EYE: tray inside 34 x 10-1/2 in with 1-1/2 in of usable depth is 535.5 cubic inches - about 8,775 mL worked one way, and 2.32 gallons (about 297 fl oz, about 8,780 mL) worked the other. Against an honestly stated slushy-day estimate of 200 mL of meltwater per boot (12 boots = 2,400 mL for a full 6-pair day), that is a margin of about 3.7 times - and the plan still pour-tests the built tray with a measured 2.4 L standing for one hour before the rack is trusted, and still tells you to empty it after a slushy day. The tray interior is sealed waterproof (three coats of spar urethane, corner beads called out), it slides out under the front rail with 1 in of clearance to spare, and waterproof leg pads - plus a full-footprint mat on any finished floor - protect the floor under it.
WET WEIGHT WORKED HONESTLY: a wet pair of work boots is worked at 6.5 lb (about 4 lb dry, the rest soaked leather, lining water, and slush - labelled an estimate in the plan, with a load test using your real wet footwear). That is 19.5 lb per tier and 39 lb total; each tier is designed and load-tested at 40 lb, a margin of about 2.1 times. Every slat end bears a full 1-1/2 in on a support ledge screwed through both legs, and every fastener's bite is printed: frame screws #8 x 2-1/2 in bite 1 in (with glue at every frame joint), slat screws #8 x 1-1/4 in bite 1/2 in with the tip 1/4 in inside the ledge, tray screws #6 x 7/8 in bite 3/8 in with the tip 1/8 in inside the tray bottom's face.
EVERY MEASUREMENT TWO WAYS: width by bays (3 x 11-1/2 in + 2 dividers x 3/4 in = 36 in interior) and by total pair width (6 pairs x 11-1/2 in = 69 in, split across two tiers), overall width by outside sum and by parts sum (39 in both ways), depth by frame (15 - 1-1/2 - 1-1/2 = 12 in) and by the slat-and-gap sum (four 2-1/2 in slats, three 1/2 in gaps, two 1/4 in margins = 12 in), height by zones (10 + 14 + 12 = 36 in) and by absolute heights. BOOT CLEARANCE STATED PLAINLY: the lower tier clears 13-1/4 in, so it takes shoes and boots up to 12 in tall; tall boots go on the OPEN-TOPPED upper tier - a 16 in boot stands free with its top above the 36 in frame and nothing to hit. No drying-time claim is made anywhere: room, footwear, and weather decide drying speed, and a plan that promises you a number for it is inventing one.
BEGINNER-FIRST, IN DEPTH: every term defined at first use (tier, bay, slat, support ledge, divider, drip tray, drip path, bearing, bite, GFCI, spar urethane), a practice-first stage proving the slat screw bite on scrap and a glued tray corner under a ten-minute water test, 24 continuously numbered steps in 6 stages, 12 labelled diagrams placed at their steps, a stop-and-check after every stage, mistake fixes (a tray that won't slide, a pour test that wets the floor, a seeping tray corner, a rocking slat, a tipping rack, musty slow drying, a loose divider), a good/better materials path (pine vs rot-resistant cedar or oak slats, zinc vs stainless screws - the wet-zone upgrade that genuinely matters, plywood tray vs PVC/HDPE sheet tray), and sourcing with exactly what to order, including the lumber yield math (4 legs from 2 boards of 2x2; 8 slats and 4 rails from 6 boards of 1x3, dividers from the rail offcuts), with costs labelled estimates totalling $85-$130.
You receive: the PDF plan only (digital download, no physical product ships) with cut list, materials list, full two-way verification section, and final completion checklist. Full build plans and material list in the TheWorkshopBlueprint website store at theworkshopblueprint.shop.